
Buying a Metal Building From Quote to Installation

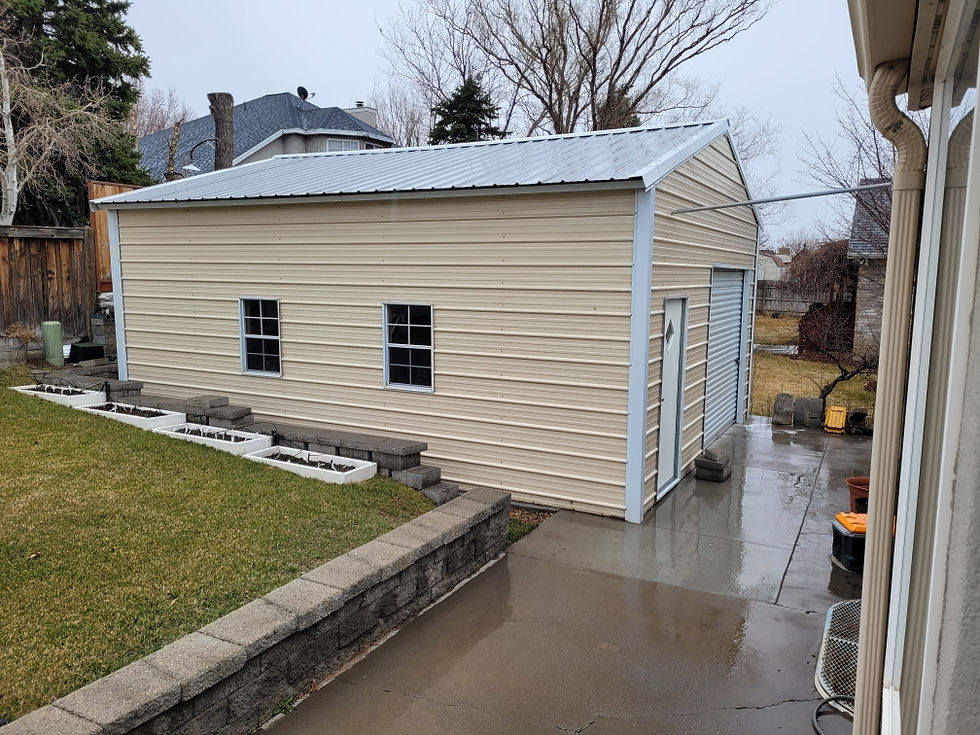
A completed metal garage. Existing concrete, drainage, and installation access are details to review during planning.
Buying a metal building starts with two practical questions: What does it need to do, and where will it go?
An RV cover on gravel, a garage on an existing driveway, and a larger shop with a new slab each need a different plan. This guide explains the metal building buying process, including permits, site preparation, financing, and installation day.
You can request a quote while you explore your options. Before committing to the final design or starting site work, settle the local requirements, foundation approach, access, and total budget.
The buying process at a glance
Choose the building's use, size, and location.
Check permits, engineering, and the full project budget.
Approve the design, contract, and payment arrangements.
Prepare the site, access route, and any required equipment.
Complete installation, review the work, and obtain required final approvals.
Your written contract, approved plans, and project-specific installation instructions govern the work. The sections below help you identify what to settle at each stage.
1 Choose the right building size and layout
Start with what will go inside. An open RV carport, an enclosed metal garage, and a working shop serve different purposes.
For an RV, measure the vehicle with its rooftop equipment and mirrors. Allow for walking room and any slide-outs you intend to use under the cover.
For a garage or shop, sketch the vehicles, workbench, shelving, and walking paths. Include the space needed to open vehicle doors and maneuver a trailer.
Check the usable clearance. Sidewall height, roof peak, and the clear door opening are different measurements. Framing and door hardware can affect what fits.
Four common project scenarios
RV cover on gravel
Focus on vehicle clearance, prepared ground, and the anchoring plan. A tall RV cover may also need lifting equipment during installation, even when the building is narrow.
Garage on an existing driveway
Start with the condition, slope, and dimensions of the concrete. The slab and proposed door openings need to work with the building design.
Backyard shop with a new slab
Coordinate the foundation, doors, and planned utilities before concrete is poured. Leave room in the layout for the work you expect to do.
Larger barn or warehouse
Discuss the intended use, structural design, delivery access, and lifting equipment early. A 40-by-60-foot or 50-by-70-foot footprint is a starting point for planning; the dimensions alone do not define the required structure or foundation.
What to send for a useful quote
Project address and intended use
Approximate width, length, and needed clear height
Open or enclosed sides, doors, and windows
Existing surface or plans for a new pad
Photos of the site and the route from the road
Budget range and preferred timing
Still comparing options? Request a metal building quote or text 385-444-4766. Rough dimensions and site photos are a useful place to start.
2 Check metal building permits and engineering
Contact the city or county responsible for the property before ordering. Describe the proposed building's size, height, location, and use.
Ask about:
Required permits and plan submissions
Setbacks, easements, and height limits
Drainage and access requirements
Inspections before, during, and after construction
Also check applicable HOA or recorded property restrictions. Do not assume a small building or open-sided carport is exempt because of its name or a rule from another town.
The property owner is responsible for obtaining the building permit. We can provide engineered drawings at an additional cost. Bring the jurisdiction's requirements into the quoting process so the design and paperwork can be coordinated.
Our metal building FAQs explain the current scope and responsibilities.
Snow and wind loads are specific to the project
Have the building department and project engineer confirm the design criteria for the address and intended use. A rating used for a nearby building is not automatically right for yours.
For Utah projects, read the notice on the USU ground snow load map. Its displayed values correspond to older code load combinations, and the notice directs users of the newer commercial code to updated resources.
Have the applicable code and design loads confirmed before treating a map result as an engineering requirement.
3 Compare the full metal building cost
Building dimensions, height, roof style, design loads, and selected openings or accessories affect the quote.
Our quoted building price generally includes applicable tax, delivery, and installation unless the quote says otherwise. Site preparation, concrete, insulation, and electrical work are outside the standard building scope.
Budget for the work around the building as well. Depending on the project, separate expenses may include:
Excavation, grading, and drainage
Concrete and foundation work
Engineering and permits
Equipment rental
Electrical service, insulation, or other finish work
Separately supplied overhead doors
A building on a usable existing pad can have a very different total project cost from a similar building on undeveloped ground.
For each expense, write down who will provide it and whether the amount is a firm price or an allowance. Review the costs of design changes, permit revisions, and rescheduling before signing.
Review financing before committing to payments
Our Get Financing page currently directs buyers to Enhancify through Dreams Carports. Available products and terms depend on the provider and your application.
When comparing an offer, look at:
APR, fees, and total repayment
Monthly payment and loan term
When funds will be available
Any prepayment charge or required collateral
The Consumer Financial Protection Bureau's personal loan overview explains factors that affect loan terms and why comparing lenders matters.
Check which project expenses the financing can cover. The current Dreams Carports financing form includes a funding-use agreement limiting proceeds to Dreams Carports services.
Get written clarification before assuming those funds can also pay an independent concrete, grading, or electrical contractor. A quote request does not guarantee financing approval.
Enter sensitive information only through the financing provider's official application. Do not send Social Security numbers or banking credentials through a general quote form or ordinary email.
4 Confirm the design and payment schedule
Before ordering, review the building as you plan to use it. Check dimensions, clear openings, door locations, roof style, colors, and included accessories.
Coordinate with any contractor supplying separate doors or interior work. Their requirements may affect decisions that need to be made before fabrication.
The purchase agreement should clearly identify the price, scope, payment dates, and responsibilities. Review the terms for changes, cancellation, delivery, equipment, and a site that is not ready. Obtain the warranty terms and service contact.
Understand when each payment is due
Our published payment schedule currently describes:
An initial payment of 12% or 15% when the contract is signed
A second payment about two weeks later, bringing the total paid to 30%
The remaining 70% when the installation crew arrives
Confirm the schedule, accepted payment method, and any processing fee in your agreement. Arrange funds for the required dates.
If a lender releases money on a different schedule, resolve that mismatch before committing to installation.
5 Prepare the site for your metal building
Agree on the surface and foundation approach during design. Give the person doing the site work the final plans and anchoring requirements.
Before excavation or ground anchoring, arrange utility locating through the applicable 811 process and follow your state's requirements.
Private lines may need separate locating. Blue Stakes of Utah explains that lines to detached garages, irrigation, propane, or septic systems may not be marked by utility operators.
Dirt or gravel
We can install suitable buildings on dirt or gravel with the appropriate anchoring system. Confirm the required prepared footprint, levelness, drainage, and working area before scheduling.
Tell the building team about recent fill, soft spots, standing water, or ground that becomes difficult to reach after rain. Fresh gravel does not establish that the ground underneath is ready.
Asphalt
Asphalt can be an installation surface for suitable projects. The building team needs to confirm the anchoring approach.
Send photos and describe the pavement's slope and condition. Include any information you have about how it was constructed.
An existing concrete slab or driveway
Have the slab reviewed before ordering a building to fit it. Provide measurements, photos, and available construction records.
The review should address its condition, thickness, reinforcement, edges, and suitability for the proposed foundation and anchoring. An existing slab may be usable, need changes, or be unsuitable for the building.
If its construction is unknown, have the engineer or installer determine what must be verified before drilling. Disclose embedded utilities and any known post-tensioning.
A new concrete slab
Give the concrete contractor the final building and foundation information before the slab is formed. Coordinate:
Slab dimensions and finished elevations
Footings or piers, reinforcement, and anchor details
Door thresholds and planned utility locations
Drainage around the building
Schedule required inspections before concrete conceals the work. Have the appropriate project professionals confirm when it is ready for anchoring and construction equipment loads.
Plan for water at the building's base. Base-rail sealing is not part of our standard installation. Decide who will handle any specified sealing and related drainage work.
6 Plan delivery access and forklift needs
The crew needs a workable route to the site and room to assemble the building. Walk the route from the road and photograph anything tight or uncertain.
Review these points with the installation team:
Gate openings, sharp turns, and slopes
Overhead lines, branches, and other obstructions
Soft ground and underground features such as septic systems
Space to unload, stage materials, and operate equipment
Have the crew confirm the access and staging dimensions it needs. Arrange any fence removal or permission to cross another property in advance.
When does a metal building need a forklift?
Our installation FAQ currently lists a customer-supplied telescoping-boom forklift for buildings wider than 30 feet or taller than 12 feet.
Most buildings within both limits can be erected by hand. Confirm how height is measured and what your design requires before arranging a rental.
A narrow but tall RV cover may need lifting equipment. A wider shop may need it even when the height seems modest.
Get the equipment specification before you rent. The installer and rental company should agree on the machine's capacity at the required reach and height, attachments, and suitability for the ground conditions.
Also settle who will operate it and who is responsible for delivery, fuel, pickup, and extra rental days if the schedule changes.
Operation belongs with properly trained, competent personnel. OSHA's forklift guidance covers training and workplace hazards. Renting a machine does not qualify someone to operate it.
7 Confirm the installation schedule and readiness
Our FAQ currently gives approximately four to six weeks for fabrication and delivery after signing. Many installations are listed at about eight to twelve hours.
These are planning estimates. Obtain the current schedule for your project; larger or more involved buildings can take longer.
Allow time for permit review, site work, concrete readiness, and delivery coordination. Confirm the date before arranging time off or a nonrefundable equipment rental.
Before the crew is dispatched, check that:
Required permits are issued and pre-installation inspections are complete
The surface and foundation are accepted as ready
Access, staging space, and required equipment are available
The location and orientation of the building are clear
Payment arrangements match the agreement
A responsible person is available for questions
Pets, children, vehicles, and stored items can stay outside the work area
Tell the scheduler promptly if conditions change. A muddy access route or unfinished pad is easier to address before the truck leaves for your site.
8 Know what happens on erection day
At arrival, confirm the site and building orientation with the crew leader. Raise any difference between the order and the site before assembly proceeds.
Materials and equipment will occupy space around the building. The crew will complete the framing, anchoring, roof, and any walls, trim, doors, or windows included in the order.
The installation team directs the work sequence and safety precautions. Stay clear of the work zone and keep visitors out.
Be available for questions. Coordinate other contractors through the crew leader, and leave lifting, framing, roof work, and equipment operation to qualified personnel.
If weather or a site condition affects safety, let the installation team determine the appropriate next step.
9 Review the finished building and remaining work
When the crew says the installation is ready for review, compare it with the order.
Check the location, configuration, and included features
Have supplied doors and locks demonstrated
Look for visible damage or missing items
Review the agreed cleanup
Record unresolved items, the responsible contact, and the next step
Keep the contract, approved plans, receipts, warranty information, and useful installation photos together.
An erected shell may still need inspections, utilities, insulation, separately supplied doors, or other finish work. A shell intended for living space also needs the design, approvals, and finish work required for that use.
Check with the local building department about final approvals before using or occupying the building. Salt Lake City's permitting overview is one local example of the steps between construction and final approval.
Follow the applicable care instructions. Discuss alterations, added loads, or a change of use with the appropriate building professional before changing the structure.
Talk through your metal building project
You do not need every detail settled to start. Tell us what the building needs to do, where it will go, and what is already on the site.
Iron Fort serves Utah, southern Idaho, eastern Nevada, northern Arizona, western Colorado, and northwestern New Mexico. Share your project address so we can confirm service for your location.
Use the quote, call, or text options below to get started.
The number for calls and texts is 385-444-4766.
Comments